HTML & CSS Lesson 1
Introduction to HTML
Objectives
In this tutorial we are going to look at:
- What is HTML?
- What is an element?
- Webpage structure
- Fundamental HTML elements
- Special HTML characters
- HTML commenting
Goal
By the end of this tutorial you will have built this webpage.
What is HTML?
HTML is the language used to build websites. All text and content that you see on the internet is built using HTML.
CSS is used with HTML to style the page. However we will not be learning any of this today as this is covered in the next tutorial.
What does HTML stand for?
Hyper Text Markup Language
HTML elements
An element is an HTML building block. There are paragraphs, headings, links, lists, and many more.
HTML elements are made up of an opening tag, followed by content then the closing tag.
<tagname>some content</tagname>
Some HTML elements do not need a closing tag as they are used to place standalone elements on the webpage. For example:
<hr>
<img>
Webpage structure
The doctype is the first thing that must be defined in an HTML page. It tells the browser which version of HTML the page is using.
<!DOCTYPE html>
We will only be using html for now, but you can find more about doctypes here.
The doctype is always followed by the <html> tag, which contains the contents of your page.
<!DOCTYPE html>
<html>
</html>
HEAD and BODY tags
A HTML page is split into two parts. The head and the body.
The head contains important webpage information like the page title (the text in the browser tab), stylesheets, scripts and meta information.
The body contains webpage content that is visible to the user.
Let’s get coding!
Let’s start by defining the basic structure of your website. Create a new folder for your work called “HTML tutorial 1”. Then inside this folder create a new file called “index.html”.
Using what we just learnt, and with guidance from your coach, create the following:
- declare the doctype to be HTML
- open and close a set of
<html></html>tags - Within this, create the head and body tags
If you load this in your browser, do you see anything on the page?
Now inside your head tag create a <title> tag with I love owls as your title.
You should see that the tab bar has changed. If not, double check your code.
<!DOCTYPE html>
<html>
  <head>
    <title>I love owls</title>
  </head>
  <body>
  </body>
</html>
Notice how each tag is indented to its parent tag. This is important as it makes your code much easier to read and you’ll be able to see nested tags much easier.
Element: Headings
Headings come in 6 sizes
<h1>Heading</h1>
<h2>Heading</h2>
<h3>Heading</h3>
<h4>Heading</h4>
<h5>Heading</h5>
<h6>Heading</h6>
A h1 defines the most important heading whereas a h6 defines the least important.
Add a h1 heading tag, which includes the word Owls, inside the body tag of your page.
Element: Paragraph <p>
Putting content into a <p> tag will break your text up into paragraphs. This helps make the content of your page easier to read for the user.
Add the following paragraph inside your <body> tag, after the <h1>:
<p>
  Most birds of prey sport eyes on the sides of their heads,
  but the stereoscopic nature of the owl's forward-facing eyes permits the greater
  sense of depth perception necessary for low-light hunting.
</p>
Element: Link <a>
A link lets the user click through to another webpage. We use the attribute href to indicate where you want the user to go.
Let’s add a link to the bottom of your paragraph:
<a href="https://en.wikipedia.org/wiki/Owl">More information about owls...</a>
Element: Div <div>
A div tag lets you group elements together. Grouping elements is useful as we can later style them together (e.g. giving them all the same colour).
Wrap your existing paragraph and link in a div and add a new heading to it.
<div>
  <h1>Owls</h1>
  <p>
    Most birds of prey sport eyes on the sides of their heads,
    but the stereoscopic nature of the owl's forward-facing eyes permits the greater
    sense of depth perception necessary for low-light hunting.
    <a href="https://en.wikipedia.org/wiki/Owl">More information about owls...</a>
  </p>
</div>
Element: List <li>
There are two types of lists that can included on a webpage, ordered and unordered.
An unordered list <ul> is defined with bullets whilst an ordered list <ol> uses a numbered sequence.
Let’s create a new <h2> then underneath list the reasons we love owls:
<h2>Why do I like owls so much?</h2>
<ol>
  <li>they are adorable</li>
  <li>and lovely</li>
  <li>and cuddly</li>
</ol>
If you wanted to make this an unordered list, what would you change? How could you check it worked? Try it, then change your list back to an ordered list.
Element: Image <img>
So far we’ve learned a lot about how to add text to our page. Now let’s add some images!
Before we start, we’ll need to add the image files we want to use to the project folder. It’s very important to keep images in their own folder, so first, create a folder called ‘images’ inside the same folder as your HTML file. Next, download the images you’ll need. Do this by right clicking on each of the following links, select ‘Save Link As…’, and save it to the images folder you just created:
Images are primarily made up of three attributes
- the
<img>tag - the
srcattribute, which lets the page know what image we want to view - the
altattribute, this provides extra information if the image cannot be seen on the webpage for any reason
In order for us to see this image on the webpage we need to link to the image, this involves telling the webpage where it is and what it is called. Before the main heading of the page, add the following
<div>
  <img src="images/logo.png" alt="codebar.io">
</div>
Here you can see we have told the src of the image to look in the images folder and display the image logo.png, then we have given it a relevant alt attribute.
Let’s add some more images. This time, we’ll put them in a list.
Do this underneath the <h2>Why do I like owls so much?</h2> heading.
<ul>
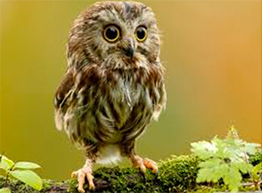
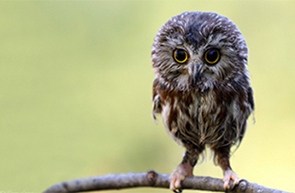
<li><img src="images/img1.jpg" alt="adorable"></li>
<li><img src="images/img2.jpg" alt="lovely"></li>
<li><img src="images/img3.jpg" alt="cuddly"></li>
</ul>
Adding a link on multiple elements
Links can contain many elements - not just text.
Let’s use some pictures and text to link to a video. It can be handy when we want the user to get to where we want without needing to click on text.
Add this underneath the ordered list about why we like owls.
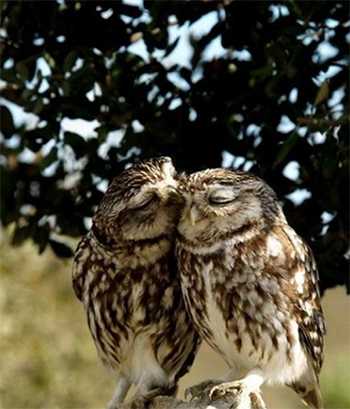
<div>
  <a href="https://www.youtube.com/watch?v=gBjnfgnwXic">
    <img src="images/img4.jpg" alt="cute owl">
    <img src="images/img5.jpg" alt="another cute owl">
    <br>
    Watch the video
  </a>
</div>
Click any of the images. Can you get to the link’s page? What happens if you take the
<br>tag out? Remember to put it back afterwards!
Formatting text
We can also emphasise or make text important.
For emphasis we use <em> and for importance <strong>
Let’s emphasise some of the content of your paragraph
<p>
  Most birds of prey sport eyes on the sides of their heads,
  but the stereoscopic nature of
  the owl's forward-facing <strong>eyes permits the greater
  sense of depth perception</strong> necessary for low-light hunting.
</p>
Special characters and more formatting
Some characters have special meaning in HTML. For instance, we use < and > to make HTML tags, and we use “ to wrap our attributes. But what if we wanted to use those characters in our page?
One way is to use HTML entities. These are made up of an ampersand, a name, then a semicolon. Here’s the HTML entity for a quote character: ".
You can also use a numerical format to produce special characters. Here’s a list of some common entities.
Add a small rhyme to your page, in which the first sentence says “The Owl & the Pussy-cat” instead of “The Owl and the Pussy-cat” using HTML entities for the ampersand: &.
<div>
<p>
<strong>
"The Owl & the Pussy-cat went to sea <br>
In a beautiful pea-green boat"
</strong>
</p>
<small>— nursery rhyme</small>
</div>
<small> is another html formatting element that you can use.
Have you noticed how the character
—renders on the page?
mailto links <a>
Links can also open up a user’s email client and share content. The difference between links and mailto links is the content defined in the href attribute.
<ul>
  <li>
     <a href="mailto:[email protected]?subject=I%20love%20owls%20::%20codebar">Email us</a>
  </li>
  <li>
     <a href="mailto:?subject=I%20love%20owls%20::%20codebar">Email a friend</a>
  </li>
</ul>
What happens when you click the first link?
What happens when you click the second link? How is it different?
What happens when you add
&body=Owls%20are%20amazingto the second link?
Note that replacing spaces in the subject text with %20 isn’t essential but makes sure the spaces are kept when opening the link in a range of both new and older email clients/software.
Commenting
You can use a special kind of tag to add notes to our page that the computer will ignore. Comments are particularly useful when wanting to remind yourself, or other programmers, how your code works.
<!-- Note to self: this is where the header goes -->
Bonus
Twitter share
Add a share on twitter link along with your other sharing links.
<a href="https://twitter.com/home?status=I love owls! via @codebar">Share your love of owls on twitter</a>
This ends our first lesson, we hope you enjoyed it and learnt something. If you have some spare time how about going back through this tutorial and, by yourself, make some amendments. If there is something you did not understand or want to give us some feedback, please send us an email.